Getting started
Get Clear NDR running in a few minutes with default settings.
Prerequisites
The system needs to have docker set up. The
user running stamusctl commands should be allowed to run docker commands. If
not, it is possible to use sudo stamusctl instead.
The minimal configuration for production usage is 2 cores and 9 Gb of memory. Currently only amd64 architecture is supported.
As Suricata and OpenSearch are multithreaded, more cores typically lead to better performance. The more traffic there is to monitor, the more beneficial it becomes to allocate additional memory.
Install latest version of stamusctl
stamusctl is a Go binary used to start and control Clear NDR instances.
Quick Installation
Choose one of the following methods:
Option 1: From GitHub Releases (Recommended)
wget https://github.com/StamusNetworks/stamusctl/releases/latest/download/stamusctl-linux-amd64
chmod +x stamusctl-linux-amd64
sudo mv stamusctl-linux-amd64 /usr/local/bin/stamusctl
Option 2: From Stamus Networks
wget https://dl.clearndr.io/stamusctl-linux-amd64
chmod +x stamusctl-linux-amd64
sudo mv stamusctl-linux-amd64 /usr/local/bin/stamusctl
Installing to /usr/local/bin/ allows running stamusctl directly from anywhere in the terminal. If you prefer to install locally, you can use ./stamusctl instead by keeping the binary in your current directory.
Configure and start Clear NDR
Clear NDR default installation analyzes traffic on a live interface and stores all events generated by the analysis.
Initialize Configuration
stamusctl compose init
The init command will prompt for a sniffing interface if more than one is available.
Setting up the HOME_NET variable used for detection is highly recommended if your network is using IPv6. See Setting up HOME_NET for more details.
Start the Stack
stamusctl compose up -d
More customization options are available in expert mode (-E flag at init), but note that configuration can be changed at any later moment.
The stamusctl compose init command creates a config directory containing configuration and data. Interacting with an instance requires running the command from the parent directory of config.
Once all components are started, network traffic on the selected live interface is analyzed and the result is displayed in the user interface.
Connect to the web interface
It is now possible to connect to the user interface at https://localhost/ with username clearndr and password clearndr.
The landing page will then be displayed, showing the IDS events generated by the Suricata engine. If the capture device is internet facing, alerts should arrive fast. If not, it may be necessary to replay some PCAP files.
Network Security Monitoring in Clear NDR is active by default. Application layer events can be accessed via the OpenSearch Dashboards link in the left menu to discover the activity on the captured network interface even if there are no alerts.
Replay some PCAP files
This phase is optional but can be used to populate the system with the results of PCAP file analysis. The readpcap command can be used to replay any PCAP file.
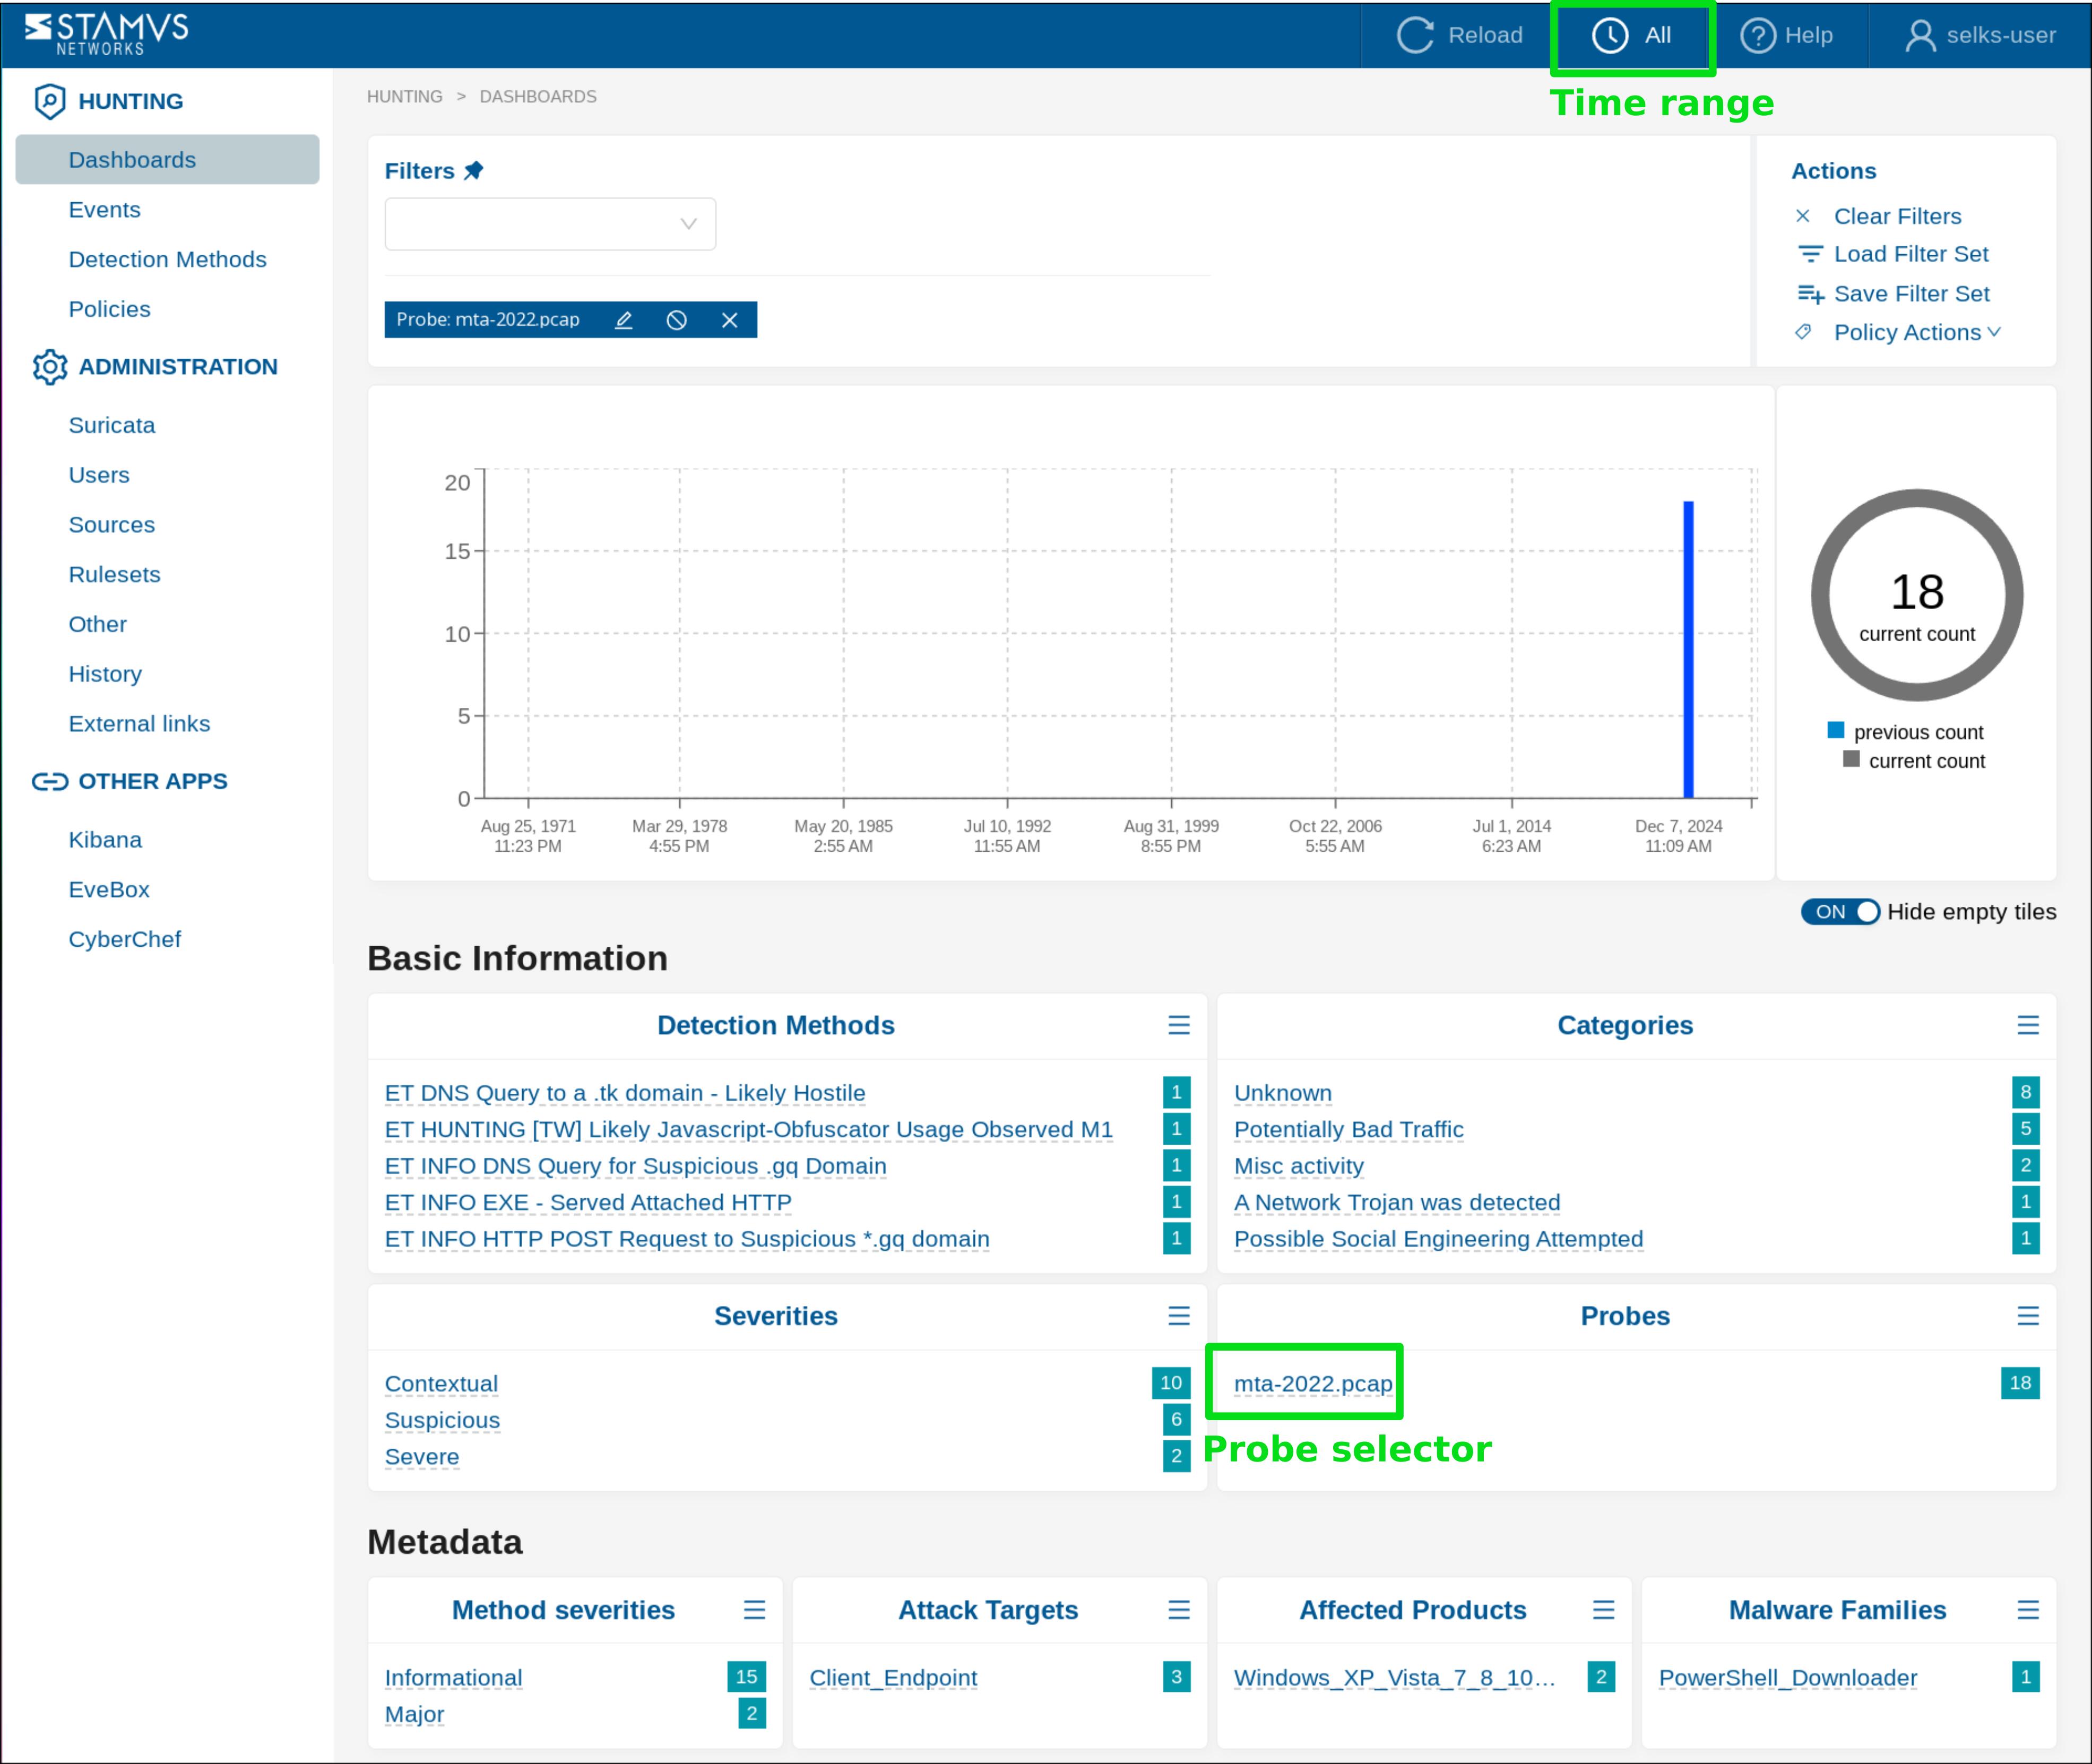
For example, if a PCAP file mta-2022.pcap is available from Malware Traffic Analysis in the Downloads directory, the following command can be run:
stamusctl compose readpcap ~/Downloads/mta-2022.pcap
The readpcap command can be used to replay any PCAP file, but the path needs to be absolute.
Then, select All time range and click to select the probe mta-2022.pcap to display only the events corresponding to this PCAP file:
Stop the Clear NDR instance
Stopping the instance can be done by running:
stamusctl compose down
The instance can be removed from the system by running:
stamusctl compose down -v
rm -rf config/
List all Clear NDR instances
To list all Clear NDR instances on the system, run:
stamusctl config list
Advanced Configuration
For advanced users, additional configuration options are available:
Expert Mode
Initialize with expert mode for more configuration options:
stamusctl compose init -E
Custom Configuration
You can set specific configuration parameters during initialization:
stamusctl compose init suricata.interfaces=eth0
Setting up the HOME_NET variable
To set the HOME_NET variable, which is used for detection, you can specify it during initialization:
stamusctl compose init suricata.homenet=192.168.0.0/16,10.0.0.0/8,172.16.0.0/12,2aa1:af0a:0b2e:fa60:0000:0000:0000:0000/64
or you can do it later by using the config command:
stamusctl config set --apply suricata.homenet=192.168.0.0/16,10.0.0.0/8,172.16.0.0/12,2a01:0e0a:0b2e:ca60:0000:0000:0000:0000/64
Custom Configuration Directory
Use a custom configuration directory path:
stamusctl compose init --config /path/to/custom/config
Template Versioning
Use a specific template version:
stamusctl compose init --version 3.2.1
Template Architecture
Clear NDR uses a template-based architecture where:
- Templates are maintained in the separate stamusctl-templates repository
- Default template is "clearndr" hosted at https://github.com/StamusNetworks/stamusctl-templates/tree/main/data/clearndr
- Template versioning is supported for reproducible deployments
- Registry integration allows templates to be pulled from container registries
This separation allows for independent template development and updates without requiring changes to the stamusctl CLI tool itself.
Daemon Mode (stamusd)
For users who need programmatic access or remote management capabilities, stamusctl includes a companion daemon called stamusd. This daemon provides a REST API with functionalities similar to the CLI tool, enabling:
- Remote management and automation
- API-based configuration management
- Programmatic control of Clear NDR instances
- Swagger-documented REST API
The daemon can be started with:
stamusd run
API documentation is available at http://localhost:8080/swagger/index.html when the daemon is running.
The daemon mode is intended for advanced users and automation scenarios. For most use cases, the CLI interface provides all necessary functionality.